If you want to have a local development version of Wordpress (or any other local development platform for that matter), the best way to do this is to install Server2go. This lets you have a simple, portable version of the database (mySQL) and the web server (Apache) that you can run locally and copy with all your folders, or give to others to run...
Why do this? Because otherwise, getting to the point where you can start developing themes or plugins is a pain.
I consider myself a well rounded developer. I don't play favorites. That means, from one day to the next I may find my self in php, coldfusion, or java. I build prototypes using ext.js framework and also have local versions of Joomla, Conflunce, MediaWiki, and even Websphere portal with WCM, and SAP Portal (I keep those beasts locked away in a WMWare enviroments). But VMware is overkill for something as light Lose Weight Exercise as Wordpress. Here are the steps for setting up a local Wordpress dev enviroment with Server2Go.
- Download Server2Go - there are several versions. To pick the right one, check the requirements of the software you want to run. Since I want to run wordpress - I look at it and downloaded this one - (only ~23MB - nice).

- Extract it somewhere (you can move it later) and and launch the server2go.exe. this starts the server. Any time you want to work in in, just launch it. If you want to change the way it works (like launch firefox instead of IE, edit pms_config.ini file.

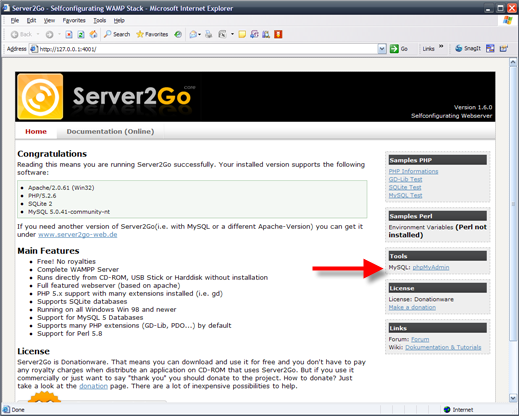
- Server2Go will launch IE for you and show the default screen. Now we have to create a wordpress database. So click phpMyAdmin under tools on the right.

- In the Create Database feild type "wordpress" (no quotes) and press "Create".

- Download the Wordpress package and unzip it into the htdocs folder in your server2go folder.

- In your browser type: http://127.0.0.1:4001/wordpress/
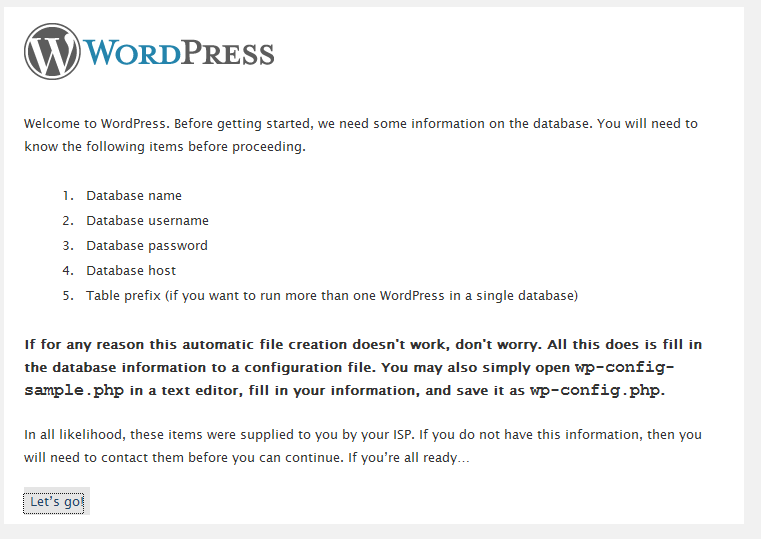
- Follow the instructions onscreen - click the create wp-config.php button, then "let's go"

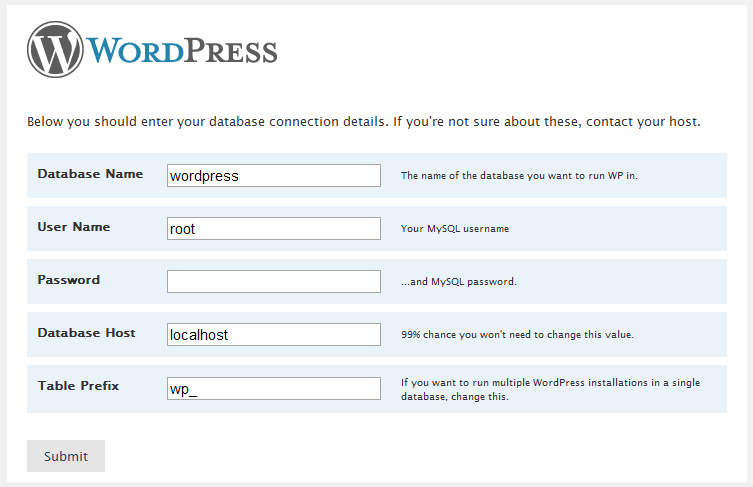
- Type "wordpress" (no qoutes) into the Database name feild and submit.

- Then you see this and that's it! WordPress should now be installed.

- Once your in wordpress, you can download themes from the internet and unzip them to the themes folder. Once you do, you can see them on the Design page in the wp_admin.
- I like to find a theme that is close to what I want and modify it. Once you find one you like, create a site in dreamweaver and edit the theme from there. You can save changes to the php files and css and see them in immediatly on the site by refreshing.